
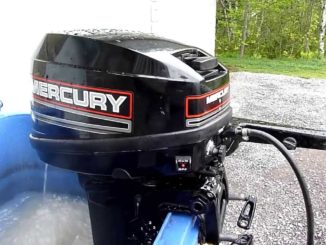
These idle mixture adjustment tuning procedures apply the Mercury outboards manufactured between 1965 thru 1989—specifically 45-HP to 115-HP models. It’s highly recommended to follow the idle mixture adjustment procedures in the factory repair manual. A downloadable version of the factory manual is available from this site. Procedures are applicable to the following models:
MERCURY OUTBOARDS
- 45 hp 4 cylinder 1965-1968
- 50 hp 3 cylinder 1986-1989
- 500/50 hp 4 cylinder 1965-1985
- 60 hp 3 cylinder 1984-1989
- 650/65 hp 3 cylinder 1972-1976
- 650/65 hp 4 cylinder 1965-1971
- 650, 700/70 hp 3 cylinder 1976-1973
- 70 hp 3 cylinder 1986-1989
- 75 hp 4 cylinder 1984-1986
- 80 hp 3 cylinder 1987-1989
- 800/80 hp 4 cylinder 1969-1983
- 850/85 hp 4 cylinder 1973-1977
- 90 hp 3 cylinder 1987-1989
- 850XS/90 hp 4 cylinder 1976
- 100 hp 4 cylinder 1988-1989
- 115 hp 4 cylinder 1988-1989
Testing and diagnosis helps determine problems and possible causes. Its important to perform extensive testing and troubleshooting prior to any major tear down or repair work. This ensures that the full extent of the problem is understood beforehand and may prevent any unnecessary repair work. Its recommended you use a factory repair manual when performing repairs on any vehicle, additional safety precautions, or technical data maybe included.
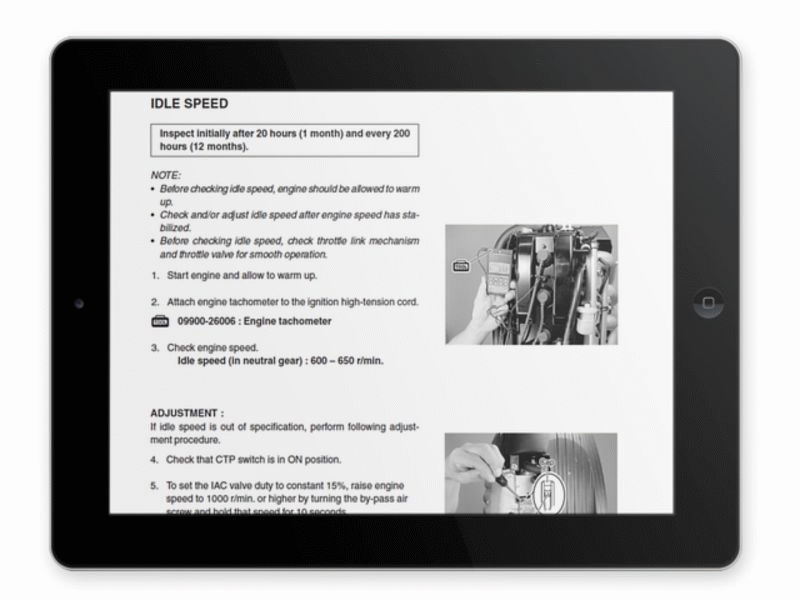
IDLE MIXTURE ADJUSTMENT
The idle mixture and idle speed are set to factory specifications from the manufacture. However, over time periodic adjustments will be necessary for optimum performance. When making adjustments to the carburetor, it may be necessary to adjust the carb settings while the motor is running in a test tank or out on the water. To accurately adjust the idle mixture and the idle rpm, the motor should be under normal operating conditions.
Set the idle mixture screw at the specified number of turns open from a lightly seated position. Under most circumstances this would be from 1 to 1 1/2 turns open from close.
Turn the engine on and allow the motor to warm to normal operating temperatures.
WARNING: Water must be circulating through the lower unit to the engine during tuning. Without water circulating though the lower unit, the water pump will fail within in just 5 seconds. Furthermore, the engine risks overheating. Never operate the motor without a flush device attached. Extensive damage will result.
With the engine at normal operating conditions, place the engine in forward gear and turn the idle mixture screw counterclockwise (slowly) until the affected cylinders start to fire unevenly (this is a result of an over-rich mixture). Then, turn the idle mixture screw clockwise (slowly) until the engine fires evenly ( you’ll notice the engine rpm increase). Continue to turn the idle mixture screw clockwise until the mixture becomes lean and the outboard motor begins to misfire (you’ll notice the rpm’s falling). Then, set the outboard idle mixture screw 1/4 turn out (counter clockwise) from the lean out position. This adjustment should result in a true approximate setting.
A setting that is to lean will cause hard starting on a cold engine. In fact, the main reason for hard starting on a cold engine is a result of a lean setting. Generally, its always better to have the setting a little rich rather than on the lean side. Always make sure the the engine is not running lean. If after the idle mixture adjustments are made and the motor hesitates during acceleration, the mixture is to lean. This can be resolved by enriching the mixture slightly by turning the idle mixture screw inward. Retest the acceleration condition after the adjustments have been made.
Loosen the locknut so you may adjust the idle stop screw on the stop bracket until the motor idles at the factory recommended rpm in the forward gear. The factory manufacture suggests the range to be 550-650 rpm. Then tighten the locknut to keep the adjustment from slipping.
NOTE: Most idle adjustment screws are located in the same area as the motors listed in the beginning of this article. Some differences may apply depending on year and model.
NOTE: Always use a flush attachment anytime your running the motor at idle speed.

Leave a Reply